How to Make a Bottle Water Filter: Materials and Steps
This post contains affiliate links. As an Amazon Associate, we earn from qualifying purchases.
When contaminated water threatens your safety during camping trips, natural disasters, or travel to remote areas, knowing the precise materials needed to make a bottle water filter becomes critical. This simple system transforms a plastic bottle into a life-saving tool capable of removing visible debris and improving water clarity—but only if you gather the correct components in the right proportions. I’ve seen well-intentioned survivors waste precious time using dyed craft sand or contaminated gravel, rendering their filters useless when clean water matters most.
This guide eliminates guesswork by detailing every single item required to build an effective bottle water filter, verified through emergency response protocols. You’ll discover not just what to collect, but why each material’s specific properties matter, how to identify dangerous substitutes, and exactly how much of each component you need for reliable filtration. Whether you’re preparing a bug-out bag or teaching wilderness skills, this checklist ensures your DIY filter actually works when you pour murky water through it.
Plastic Bottle Selection and Modification Tools
Your foundation must be a standard 16.9 fl oz (500ml) single-use plastic water bottle—not soda or sports drink containers. These bottles use food-grade PET plastic designed for liquid storage without leaching chemicals. Avoid opaque or colored bottles that may contain dyes contaminating your filtered water. The tapered neck creates perfect layer compression while the 500ml size provides ideal filtration depth without excessive material requirements.
Precision Cutting Requirements
Use sharp kitchen shears or a utility knife to remove the bottom inch cleanly. Dull blades cause jagged edges that compromise structural integrity and create gaps where unfiltered water bypasses layers. After cutting, invert the bottle and place the removed base section underneath as a stable stand—this dual-purpose use prevents wobbling during filtration. Always cut outdoors or over a hard surface; plastic shards become hazardous if they fall into your filter materials.
Critical Base Layer Components
Cotton Ball Sealing Technique
Pack 6-8 compressed cotton balls tightly into the bottle neck to form a ½-inch thick barrier. This layer prevents sand and charcoal from escaping while allowing water to drip through. Never use polyester stuffing or cotton batting—these contain synthetic fibers that shed microplastics into your water. If cotton balls aren’t available, tear a clean white cotton T-shirt into strips and weave them densely across the opening, ensuring no gaps larger than a grain of rice remain.
Coffee Filter Cap Method
For superior fine-particle blocking, screw a standard paper coffee filter inside the bottle cap before tightening. Pierce 5-7 evenly spaced holes through both cap and filter using a nail—too few holes restrict flow, while too many reduce filtration effectiveness. This creates a dual-layer defense where the cap holes distribute water evenly across the filter surface. Discard any filter showing discoloration or musty odors, as these indicate mold contamination.
Activated Charcoal Specifications

Emergency Charcoal Sourcing and Prep
Break food-safe activated charcoal into pea-sized fragments using a rock or hammer—never use charcoal briquettes containing lighter fluid. If only standard grill charcoal is available, rinse it thoroughly under running water for 5 minutes to remove chemical residues before crushing. Aim for 1 inch of loosely packed charcoal above your base layer; overpacking creates excessive resistance that slows filtration to a useless trickle. This layer chemically binds chlorine, pesticides, and organic compounds that sand alone can’t remove.
Critical Charcoal Warning
Avoid “self-starting” charcoal at all costs—its petroleum-based accelerants will poison your water. Test questionable charcoal by smelling it: any chemical odor means discard it immediately. In survival scenarios, collect wood charcoal from natural forest fires (not campfires) and crush it between flat stones. Never skip this layer; without activated charcoal, your filter only removes visible debris while leaving dangerous dissolved contaminants.
Sand Layer Requirements
Fine Sand Collection Protocol
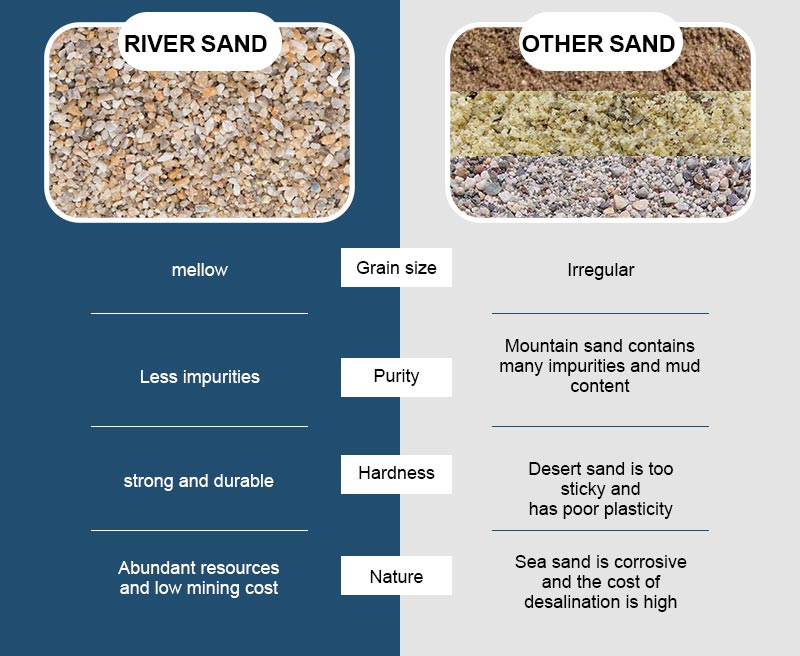
Gather natural riverbed or beach sand free of shells and organic matter, then rinse it in clean water until runoff runs clear—this removes salts and microorganisms. Fill to exactly 1 inch depth above the charcoal layer; insufficient sand allows charcoal particles to migrate downward while excess sand clogs the filter. Avoid sandbox sand treated with anti-fungal chemicals or colored craft sand containing dyes. The grains must feel smooth between your fingers, not gritty like crushed rock.
Coarse Sand Layer Implementation
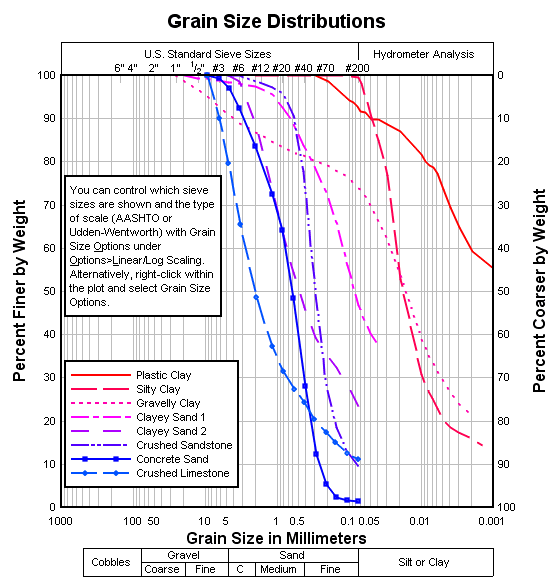
Place 1 inch of coarse sand (grains visible to the naked eye) directly above the fine sand. This gradient layering prevents fine sand from washing into the charcoal while catching larger particles. If pure coarse sand isn’t available, mix fine sand with small pebbles no larger than a sesame seed. Never substitute soil—its clay content will turn to mud and completely block water flow within minutes. Pack both sand layers gently with a spoon handle to eliminate air pockets without compacting them.
Gravel Top Layer Essentials
Natural Gravel Sourcing Guidelines
Collect mixed-size gravel from stream beds or dry riverbanks, avoiding limestone-rich areas that alter water pH. Clean thoroughly by swirling in clean water until no silt remains—this removes fine sediments that would otherwise clog lower layers. Fill to 1 inch below the bottle’s cut edge; too little gravel allows debris to overwhelm the system, while overfilling causes spillage during pouring. Ideal pieces range from ¼ to ½ inch diameter—small enough to nest together without gaps, yet large enough to permit water flow.
Gravel Contamination Check
Discard any gravel showing white chalky deposits (indicating calcium carbonate) or rust stains (iron contamination). Test by submerging a sample in clean water for 30 minutes; if the water clouds or changes color, find alternative material. In urban emergencies, clean aquarium gravel works if verified chemical-free—never use construction gravel treated with sealants.
Optional Top Strainer System
Emergency Fabric Strainer Setup
Secure a single coffee filter or clean bandana over the gravel layer with a rubber band wrapped tightly around the bottle’s exterior. This pre-filter catches leaves and insects before they enter the main system, extending your filter’s lifespan. When using fabric, fold it into four layers—fewer layers permit debris passage while more layers restrict flow. Replace this strainer after filtering 2 liters or whenever visible clogging occurs.
Strainer Maintenance Protocol
Rinse used strainers in clean water immediately after each use. Never reuse a strainer showing discoloration or odor—bacterial growth here contaminates your entire system. In prolonged emergencies, rotate between three prepared strainers to ensure one is always dry and ready. If no dedicated strainers exist, pour water through your shirt first to capture large debris.
Water Collection and Post-Filter Safety
Collection Container Verification
Use only the cut-off base section of your original bottle as the collection vessel—its perfect fit prevents spills and eliminates transfer contamination. Never pour filtered water into containers previously holding chemicals, even after washing. If the base is damaged, substitute a clean glass jar or stainless steel cup verified free of cracks or residues.
Non-Negotiable Disinfection Steps
Boil all filtered water for 3 minutes (5 minutes above 6,500 feet elevation) to kill biological pathogens—this filter removes particles but not viruses or bacteria. When fire isn’t possible, use 2 iodine tablets per liter and wait 30 minutes until the water develops a distinct medicinal smell. As a last resort, add 2 drops unscented household bleach per liter and wait 30 minutes; the water must retain a faint chlorine odor to be safe. Never drink filtered water without this critical step.
Material Sourcing in Crisis Scenarios
Natural Material Safety Checks
Collect sand and gravel at least 100 yards upstream from any human activity or animal trails to avoid fecal contamination. Test potential materials by filling a clear container with your source water and the material; if cloudiness increases after 10 minutes, discard it. Always prioritize flowing water sources—stagnant water requires significantly longer boiling times after filtration.
Pre-Storage Best Practices
Pre-wash and dry all sand/gravel in sunlight before storing in sealed glass jars labeled with layer type. Keep charcoal in airtight containers away from light to maintain adsorption capacity. Store your complete emergency kit in a cool, dark place—heat and UV exposure degrade filtration effectiveness over time. Check materials annually for moisture or insect intrusion.
Critical Assembly Sequence
Never skip these steps when gathering materials:
1. Verify bottle is food-grade plastic with no cracks
2. Prepare base layer before adding other materials
3. Measure each layer precisely with a ruler
4. Rinse all natural materials until water runs clear
5. Always combine filtration with boiling/chemical treatment
Common failure points to avoid:
– Using dyed fabrics that leach color into water
– Overpacking charcoal causing 30+ minute filtration times
– Skipping gravel layer leading to rapid clogging
– Assuming filtered water is safe to drink without disinfection
Building an effective bottle water filter requires surgical precision with materials—not improvisation. The exact 1-inch layer depths, natural material sourcing, and post-filter disinfection transform a simple bottle into a reliable water safety system. Remember: this filter improves taste and removes visible particles, but boiling remains non-negotiable for biological safety. Keep your materials kit updated and practice assembly quarterly—when contaminated water threatens your health, you’ll need this knowledge to work flawlessly on the first try. Store your prepared kit with emergency water purification tablets as the ultimate safety net for unpredictable situations.