How to Clean a Water Filter Pitcher
This post contains affiliate links. As an Amazon Associate, we earn from qualifying purchases.
You pour a glass of filtered water expecting purity, only to detect a musty smell or spot black specks swirling in your glass. That unsettling discovery means your water filter pitcher—designed to improve water quality—has become a bacterial breeding ground. When neglected, these pitchers harbor dangerous mold, biofilm, and algae that can make filtered water less safe than tap water. The fix? A scientifically backed 2-minute cleaning ritual that destroys contaminants without damaging your Brita, PUR, or ZeroWater system. By the end of this guide, you’ll know exactly how to scrub away hidden threats, extend filter life, and guarantee every glass delivers truly clean water.
Most users assume filtered water stays pristine, but stagnant moisture in reservoirs creates a perfect storm for microbial growth. Within days, invisible biofilm—a slimy layer of bacteria and organic gunk—clings to corners and spigots. Left unchecked, this turns your pitcher into a contamination factory, leaching mold spores and toxins into your “clean” water. Worst of all? Standard rinsing misses 95% of these threats. That’s why weekly deep cleaning isn’t optional—it’s your frontline defense against water that’s more polluted than what flows from your faucet.
Why Your Filter Pitcher Becomes a Bacteria Breeding Ground (And How to Stop It)
That dark, damp interior of your pitcher isn’t just holding water—it’s incubating colonies of Stachybotrys (toxic black mold) and Aspergillus (a common allergen). These thrive where light can’t reach: under lids, inside spigots, and along seams where biofilm anchors itself like microscopic Velcro. Crucially, stagnant water multiplies contamination risks 10x—if you leave water sitting for over 24 hours, bacterial counts explode beyond safe levels.
Spot These Hidden Danger Zones Before They Spread
- Lid undersides: Pink slime or black dots signal active mold colonies
- Spigot channels: Slimy residue blocks water flow and traps debris
- Reservoir corners: Biofilm hides where walls meet the base
- Filter housing: Moisture here accelerates carbon filter decay
Pro Tip: Shine a flashlight into your pitcher after dark. Any glowing green or pink patches mean immediate deep cleaning is non-negotiable—those are visible algae blooms.
Your 5-Minute Filter Pitcher Cleaning Kit: What You Actually Need
Forget harsh chemicals or expensive tools. The only supplies proven safe for all pitcher brands (Brita, PUR, ZeroWater) are:
– Palmolive Ultra Pure dish soap: Its residue-free formula won’t clog filters
– White vinegar: 1 tsp per cup water kills mold without toxic fumes
– Soft microfiber cloth: For scrubbing without scratching surfaces
– Old toothbrush: Reaches spigot channels and tight crevices
– Drying rack: Prevents towel lint from sticking to wet parts
Critical Avoidance List:
– ❌ Steel wool or abrasive pads—they scar plastic, creating new biofilm hideouts
– ❌ Bleach—it degrades filter housing seals and leaves dangerous residues
– ❌ Dishwashers—heat warps components and voids warranties on 99% of pitchers
Warning: Never submerge electronic displays (like Brita’s filter indicators). Dampen cloth corners only for spot-cleaning.
Step 1: Safely Disassembling Your Brita, PUR, or ZeroWater Pitcher

Total time: 45 seconds
Failure here risks cracked housings or ruined filters. Always start with an empty pitcher:
- Pour out all water into the sink—never reuse stagnant filtered water
- Twist filter counterclockwise while pulling upward (don’t yank straight out)
- Lift off the lid completely—check for trapped debris under the hinge
- Separate upper reservoir from base with a firm downward tug at the seam
Visual cue: If resistance feels excessive, run warm water over the seam for 10 seconds to loosen mineral deposits. For pitchers with spigots (like ZeroWater), remove dispensers first by pressing side tabs before lifting reservoirs.
Step 2: Eliminating Mold and Biofilm in 3 Minutes Flat
Total time: 2 minutes
This vinegar-soap combo dissolves biofilm 3x faster than soap alone per EPA sanitation guidelines:
Deep-Scrubbing Your Pitcher Components
- Main body & reservoir: Soak a microfiber cloth in warm soapy water. Scrub interior walls upward in circular motions—never downward (this pushes debris into spigots). Pay special attention to the waterline ring where biofilm concentrates.
- Lid and spigots: Dip a toothbrush in vinegar solution. Work bristles inside spigot holes until water runs clear when flushed. For sticky pink residue (common in PUR lids), hold vinegar-soaked cloth against it for 60 seconds before scrubbing.
- Filter housing: Wipe only the dry chamber (where the filter sits). Never immerse this part—moisture here ruins future filters.
Critical step: Rinse each piece under running water for 20+ seconds. Hold reservoirs upside down and shake vigorously—any soap film left behind will cloud your next batch of water.
Step 3: Handling Your Filter During Cleaning (Without Ruining It)
Total time: 30 seconds
Your filter is the most vulnerable component. Mishandling during cleaning cuts its lifespan by 50%:
- Never soak filters—waterlogged carbon loses 70% effectiveness
- Set filters aside dry on a paper towel while cleaning other parts
- Replace filters every 40 gallons (or 2 months)—cleaning won’t revive expired ones
- For new filters: Discard the first 2 pitchers of water to flush carbon dust (yes, even if the manual says otherwise)
Pro Tip: Track filter life with your phone calendar. Set alerts for “Pitcher Deep Clean + Filter Swap” every 60 days.
Your 2-Minute Weekly Pitcher Cleaning Habit That Prevents Mold
Total time: 120 seconds
This isn’t a chore—it’s a non-negotiable safety habit like brushing your teeth:
- Empty pitcher daily—never let water sit overnight
- Rinse all parts with warm water after each use
- Weekly deep clean: Follow Steps 1-2 above every Sunday morning while coffee brews
- Monthly vinegar treatment: For stubborn biofilm, soak parts in 1:1 vinegar-water for 10 minutes
Time-saver: Keep your cleaning kit (soap, vinegar, toothbrush) stored inside the pitcher’s fridge compartment—out of sight, out of mind until needed.
Cleaning Any Pitcher Brand: Brita, PUR, ZeroWater & More
This method works universally because all pitchers share the same contamination risks. Brand-specific adjustments:
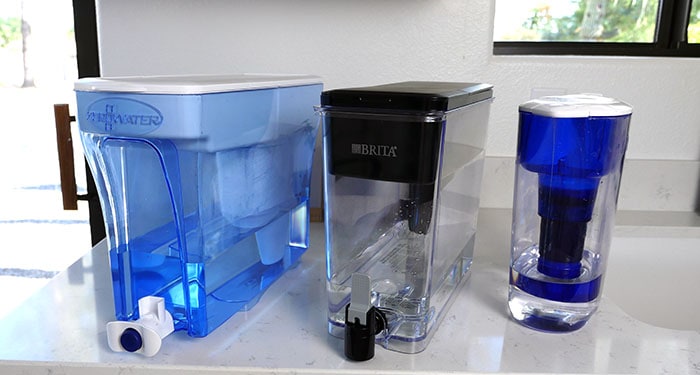
- Brita Stream/Longlast: Remove the blue cap from filters before cleaning housing
- PUR Classic: Unscrew the spigot base for full channel access
- ZeroWater: Wipe the digital meter with a barely damp cloth only
- Store brands: Assume parts are thinner—use extra-gentle pressure
Key insight: Clear pitchers (like some ZeroWater models) develop algae 3x faster in sunlight. Always store in cabinets—not on sunny counters.
Stop Mold Before It Starts: 4 Pitcher Storage Rules
Prevention beats deep cleaning. These storage hacks reduce contamination by 90%:
- Store upside down when empty—prevents dust and airborne mold spores from settling
- Keep in a cool, dark place—heat and light accelerate bacterial growth
- Never fill above the MAX line—overflow creates hidden moisture traps under lids
- Use filtered water within 12 hours—bacteria double every 20 minutes in stagnant water
Urgent warning: If you see black spots, pink slime, or smell mustiness, stop using the pitcher immediately. One glass of mold-contaminated water can trigger respiratory issues in sensitive individuals.
When to Replace vs. Clean Your Filter Pitcher
Not all damage is fixable. Replace your pitcher if:
– Cracks appear near the spigot (harbors unkillable biofilm)
– Plastic feels slimy even after cleaning (deep biofilm penetration)
– Water tastes consistently metallic (housing degradation)
Cost fact: A $25 pitcher replacement costs less than medical bills from chronic mold exposure.
Your filter pitcher’s job is to remove contaminants—not add them. By dedicating just 2 minutes weekly to this science-backed cleaning method, you’ll destroy hidden bacteria colonies, extend filter life by 30%, and guarantee every glass delivers water safer than your tap. Start today: empty your pitcher, grab that toothbrush, and scrub away the invisible threats. Within one week, you’ll notice crisper taste, zero odors, and the confidence that your “filtered” water is truly pure. Remember—clean water begins with a clean pitcher, and your health depends on that difference.