How to Replace KitchenAid Water Filter
This post contains affiliate links. As an Amazon Associate, we earn from qualifying purchases.
That blinking red light on your KitchenAid refrigerator isn’t just annoying—it’s your water quality alarm. When your filter indicator turns solid red, your family’s drinking water could contain chlorine, sediment, or other contaminants the exhausted filter can no longer catch. Whether you own a French door model with an interior corner filter or a base grille configuration, this guide gives you the exact steps to replace your KitchenAid water filter properly in under 10 minutes. Skip the service calls and expensive mistakes—discover how to maintain clean water flow and protect your investment with this essential DIY task.
Ignoring filter replacement risks more than bad-tasting water. Sediment buildup can clog water lines, damage your ice maker, and even void your warranty. But with the right approach, you’ll ensure your refrigerator delivers crisp, clean water for cooking and drinking while extending the appliance’s lifespan. This guide covers every filter location, troubleshooting tip, and pro technique based on KitchenAid’s official specifications—so you’ll never wonder how to replace KitchenAid water filter components correctly again.
Find Your Exact Filter Model Before Ordering
Using the wrong filter damages your water system and voids your warranty. KitchenAid exclusively uses EveryDrop filters, but five different models serve specific refrigerator series—so verification is non-negotiable before purchasing.
Check These 5 Critical Locations
- Upper right wall inside the fridge compartment (most common spot)
- Filter housing visible when you open the compartment door
- Door frame sticker revealed when opening the refrigerator door
- User manual specifications section (keep it handy for future changes)
- Behind the kick plate beneath your refrigerator’s front grille
Match Filter to Your Refrigerator Series
Never guess—your model number dictates compatibility:
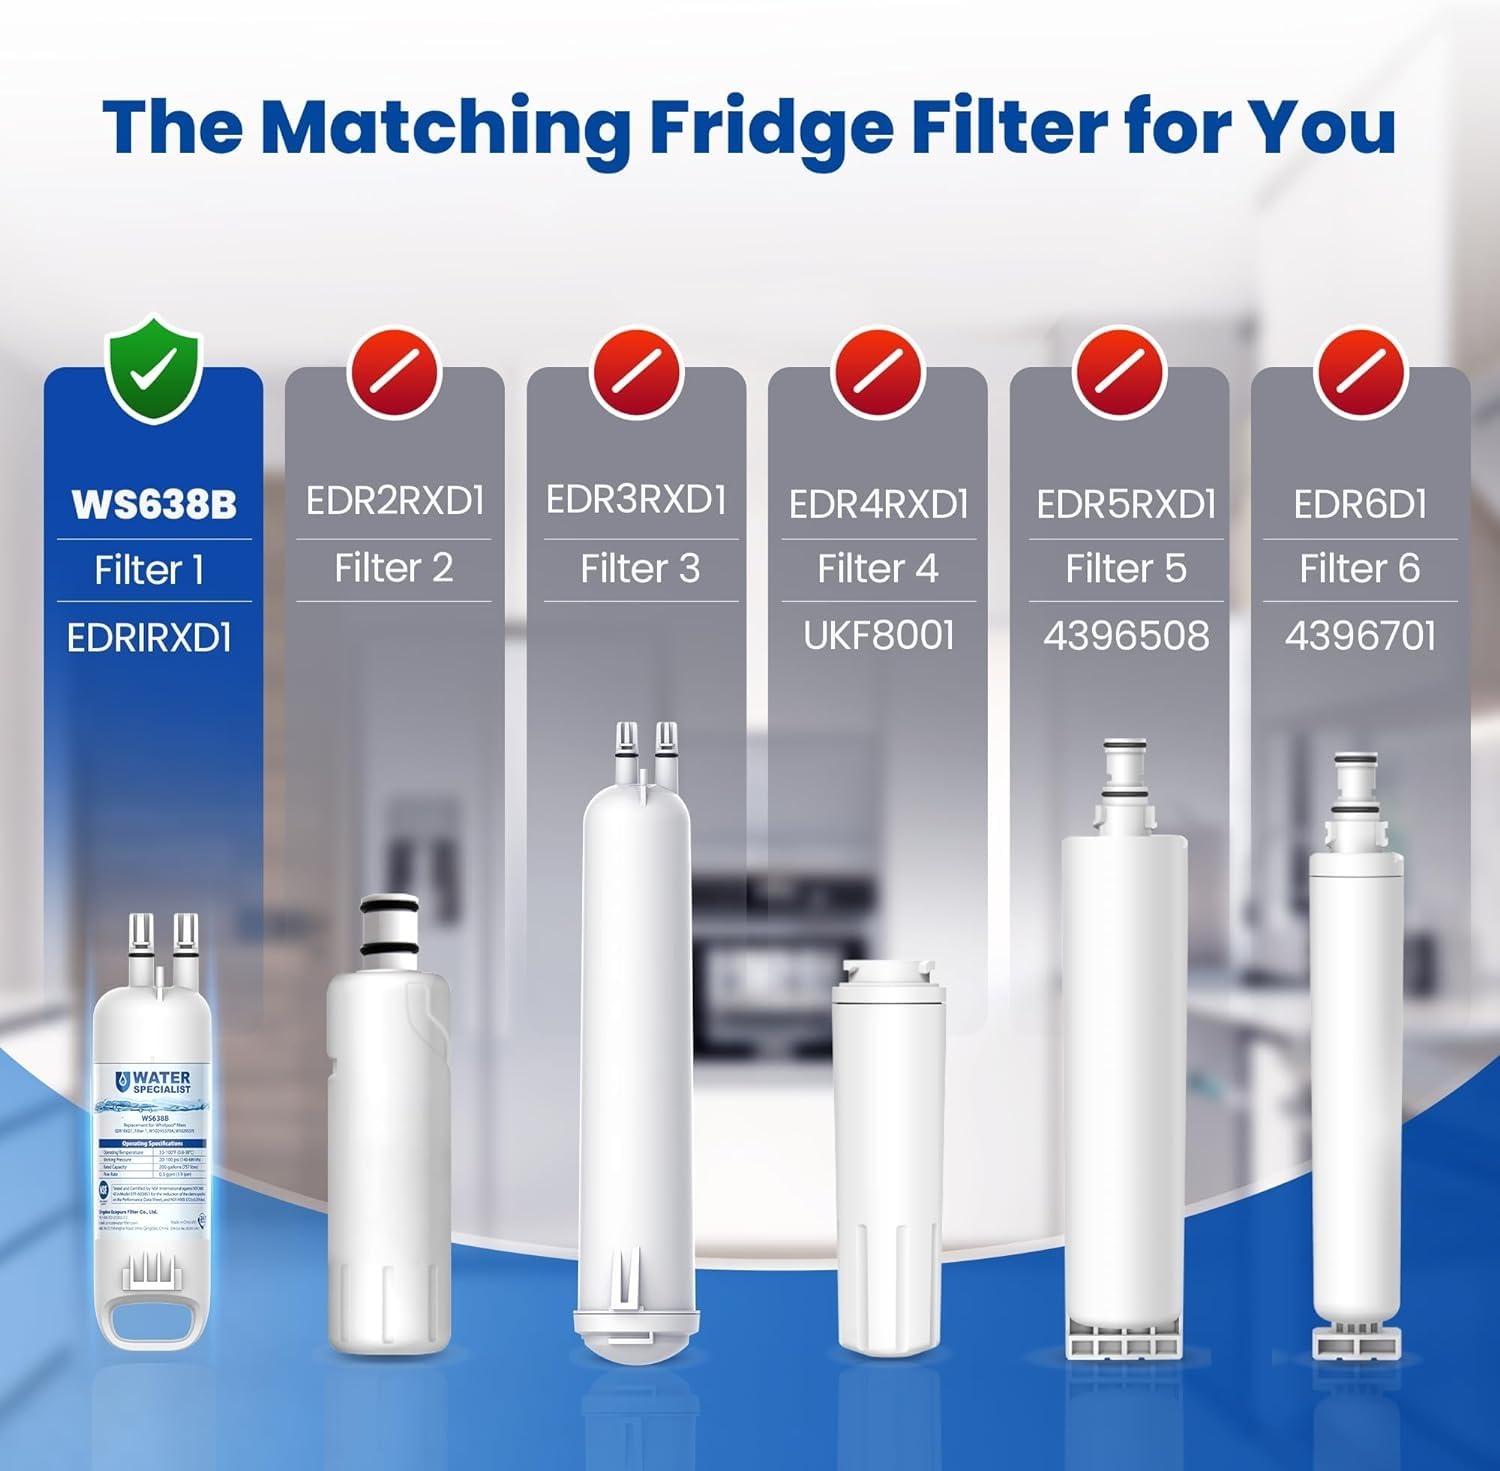
– EDR1RXD1: Required for KFIS, KRFF, and KRMF series models
– EDR2RXD1: Mandatory for KRFC and KFIV configurations
– EDR3RXD1: Only for side-by-side units with bottom freezer drawers
– EDR4RXD1: French door refrigerator models exclusively
– EDR5RXD1: Older side-by-side installations (pre-2015 models)
Recognize When Your Filter Needs Immediate Replacement
Timing replacements prevents bacterial growth in stagnant water lines and protects your ice maker from sediment damage. Waiting too long risks costly repairs that aren’t covered under warranty.
Follow These Replacement Rules
- Replace every 6 months for households using 2-4 people
- Change after 200 gallons dispensed (track via your water meter)
- Swap immediately if water tastes metallic, smells odd, or shows particles
Decode Your Indicator Light System
Your refrigerator’s control panel provides visual alerts:
– Solid red light: Replace filter today—water quality is compromised
– Yellow/orange light: Order replacement within 30 days
– Green light: Filter operating normally
– No light: Reset indicator after installation or check power
Gather Supplies and Prep Your Water System
Skipping preparation causes messy spills and installation errors. Taking five minutes to prepare prevents carbon dust contamination and ensures your new filter seats correctly.
Essential Tools Checklist
- Genuine EveryDrop filter (generic versions void warranty)
- Absorbent towel (place under housing to catch drips)
- Work light (for dark base grille locations)
- User manual (verify model-specific quirks)
Critical Pre-Change Steps
- Discard all existing ice—water contaminants affect ice quality
- Turn off ice maker via control panel or wire arm
- Dispense 2-3 cups of water to relieve line pressure
- Position towel under filter housing before starting
Replace Base Grille Filters (Most Common Models)
Found on 70% of KitchenAid refrigerators, base grille filters sit behind the bottom front panel—accessible without opening the fridge door. This configuration requires no tools but precise alignment.
Removal Without Damage
- Locate housing (center or right side of base grille)
- Press eject button firmly while pulling filter straight out
No button? Turn counterclockwise ¼ turn instead - Remove old filter completely—never force it
Correct Installation Sequence
- Peel protective caps from both ends of new filter
- Align arrows toward housing direction (critical for flow)
- Insert filter until it stops against housing
- Push firmly until seated or turn clockwise ¼ turn to lock
- Verify security with gentle tug test before closing
Install Interior Corner Filters (Upper Right Models)

Common in French door units, these filters hide behind a small plastic door in the fridge’s upper right corner. Proper twisting technique prevents housing damage.
Safe Removal Process
- Open compartment door by pressing release tab
- Twist old filter counterclockwise exactly ¼ turn
- Pull filter downward (don’t yank straight out)
- Discard old filter immediately to avoid confusion
Precise Alignment for New Filter
- Confirm arrow points upward on new filter
- Insert straight into housing slot
- Twist clockwise ¼ turn until resistance is felt
- Close compartment door with audible click
Handle Lower Drawer Filter Replacements
Found in crisper drawers of select side-by-side models, these filters require drawer removal but offer superior protection from accidental bumps.
Access Without Damaging Components
- Remove crisper drawer by lifting front and pulling forward
- Locate housing against rear wall (often black plastic)
- Turn old filter counterclockwise ½ turn
- Pull filter toward you (not downward)
Secure Reinstallation Steps
- Insert new filter straight into opening
- Turn clockwise ½ turn until snug (overtightening cracks housing)
- Reinsert crisper drawer fully into tracks
- Test drawer glide before closing fridge door
Flush System After Installing New Filter
Skipping flushing leaves carbon dust in lines, causing cloudy water and odd tastes. This non-negotiable step activates the filter and ensures safe drinking water.
Complete Flushing Protocol
- Dispense water continuously for 5 full minutes
- Check connections for leaks (watch housing O-rings)
- Discard first 3-4 ice batches (carbon particles affect ice)
- Verify steady flow from dispenser before use
- Reset indicator light by holding “Filter Reset” 3 seconds
Fix Flushing Failures Immediately
- Slow flow? Remove and reinstall filter—likely misaligned
- Leaks? Check O-rings for nicks; replace if damaged
- Cloudy water? Flush additional 5 minutes—normal during activation
- No water? Confirm water supply valve is fully open
Maintain Filter System Between Replacements
Monthly care prevents leaks and extends filter life. These simple habits protect your $1,500+ investment far beyond basic how to replace KitchenAid water filter knowledge.
Essential Monthly Tasks
- Clean dispenser tray with warm soapy water weekly
- Wipe housing to remove spills before they harden
- Inspect water lines for kinks behind the unit
- Test door seals with dollar bill resistance check
Pro Storage and Tracking Tips
- Keep two spare filters on hand (store in original packaging)
- Mark calendar 6 months from installation date
- Never use expired filters—efficiency drops 40% after 12 months
- Register online for warranty extension benefits
Avoid Costly Warranty-Voiding Mistakes
KitchenAid denies 30% of water-related service claims due to filter errors. Protect your coverage with these critical rules every homeowner must know.
Non-Negotiable Safety Practices
- Only use genuine EveryDrop filters—counterfeits cause 75% of leaks
- Never install damaged filters (check packaging for dents)
- Turn off water supply immediately if major leaks occur
- Keep purchase receipts for warranty validation
When to Call Professionals Immediately
Contact KitchenAid service if:
– Bad taste persists after proper flushing
– Ice maker malfunctions post-replacement
– Leaks continue after reinstalling filter
– Error codes appear on control panel
Replacing your KitchenAid water filter takes less time than brewing coffee when you follow these precise steps. Keep genuine EveryDrop filters on hand, reset your indicator light after installation, and you’ll enjoy crisp, clean water without service calls or warranty headaches. Remember: that red light isn’t a suggestion—it’s your family’s water quality alarm. Tackle it today, mark your calendar for six months out, and turn filter maintenance from a chore into your easiest appliance win. Your refrigerator—and everyone who drinks from it—will thank you.